Warping
Landmark warping
Step 1: Define template landmarks
Add landmark: Left-click outside template
Delete landmark: Right-click on a landmark
Move landmark: Left-click and drag landmark
Finish: L to lock template (Points cannot be added after locking template!)
Step 2: Adjust source templates
Move landmarks to homologous locations on each source
Select source: left-click on line OR use arrow keys to cycle through sources OR click on relevant row from the table
Move landmark: Left-click and drag landmark
Manual warping
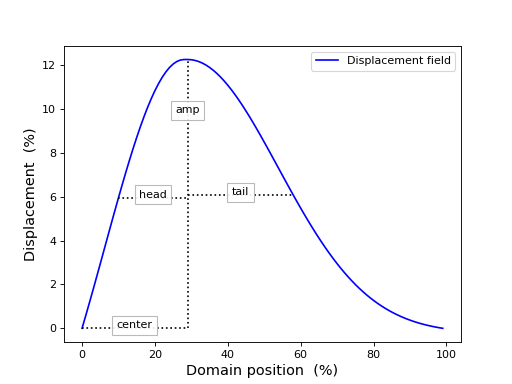
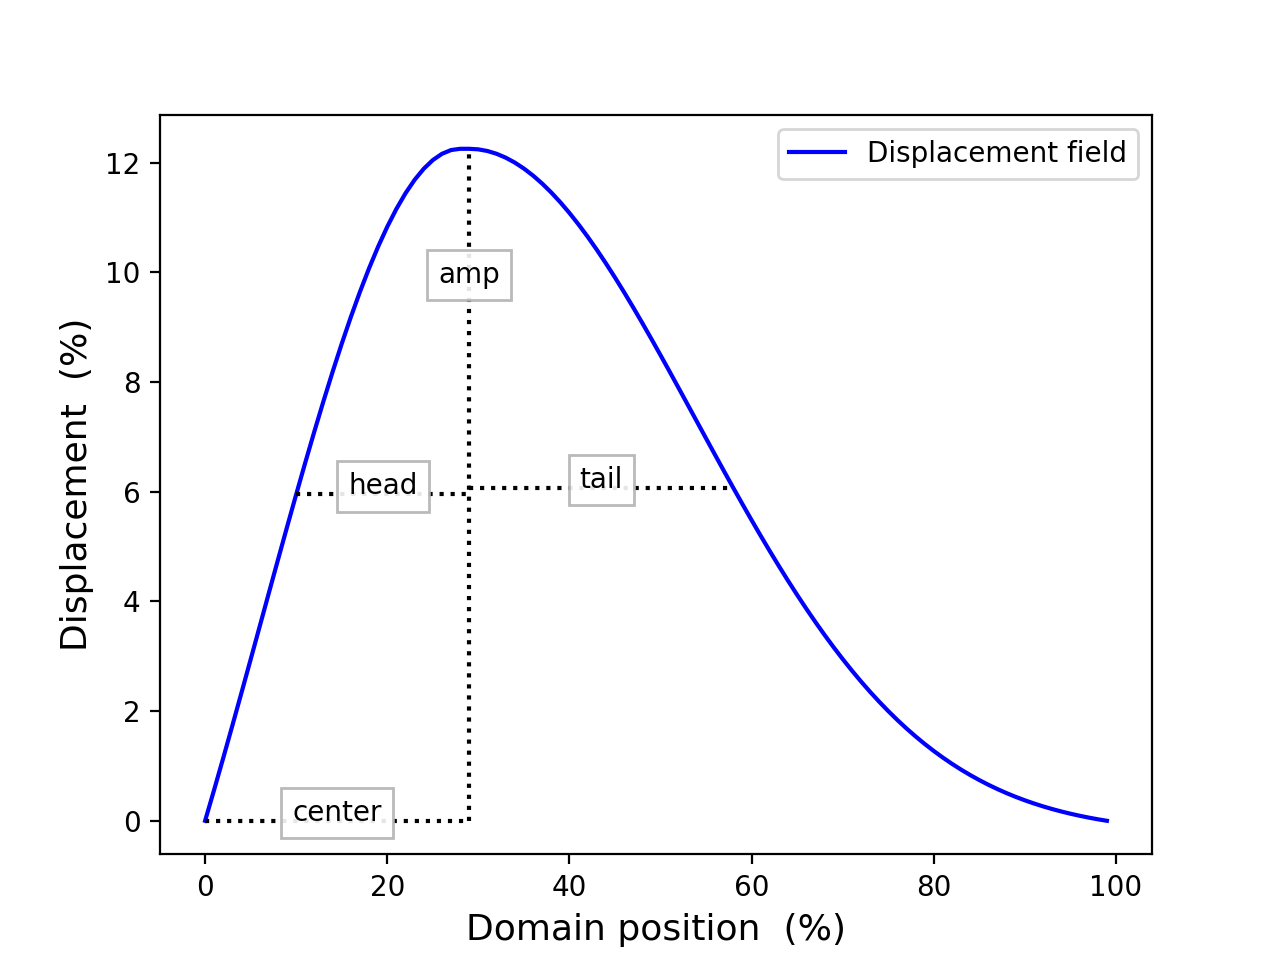
Manual (Gaussian-kernel-based) warps are defined using four parameters:
y — original 1D data
center — warp kernel center, relative to its feasible range (between 0 and 1)
amp — warp kernel amplitude, relative to its feasible range (between -1 and 1)
head — warp kernel head width, relative to its feasible range (between 0 and 1)
tail — warp kernel tail width, relative to its feasible range (between 0 and 1)
The meaning of these four parameters is depicted in the figure below.
(Source code, png, hires.png, pdf)

In order to conduct manual warping, follow the steps below.
See also the manual warping screencast.
Step 1: Position the mouse
Move the mouse on the axes to the position at which you wish to initiate the warp. This will set the
centerparameter.
Step 2: Initiate the warp
Press the “W” key to initiate a manual warp.
Step 3: Adjust the warp
Drag the mouse left-and-right to adjust the
ampparameter.Drag the mouse up-and-down to adjust the
headandtailparameters.
Step 4: Finalize the warp
Press “Enter” to apply the warp. Alternatively press “ESC” to cancel the warp.
Step 5: Restore to original data
If you are unhappy with the warp results, press “R” to restore the original data.
This will delete all existing warps for the currently selected curve.
Restoring previous sessions
If something went wrong during warping (e.g. a software crash), or if you would like to revisit previous warping sessions, then:
Launch mwarp1d
Drag a previous session’s output (NPZ) file on to the main window’s Drop Data box.
This will restore the previous session, allowing you to adjust and/or reset the previously saved warps.